NOTE: Updated 22 May 2017.
======================
As a Developer Relations Engineer, I have the opportunity to interact with talented developers every day. Whether they want to write code to better visualize financial data or to automate customer-facing email campaigns, they have one thing in common: the need for rapid integration. A common roadblock developers often encounter is authenticating API calls to QuickBooks Online.
The QuickBooks Online APIs currently support OAuth 1.0a authentication. This version of the protocol can be somewhat tricky and does not always seem straightforward. Here are some tips and tricks to help developers get started generating OAuth signatures and getting those first API calls authenticated. While there are many REST clients available today, we’ll focus on POSTMAN and cURL as they are frequently used by developers.
How to make authenticated calls in a few simple steps:
- Create an Intuit developer account, an app, and a QuickBooks Online sandbox.
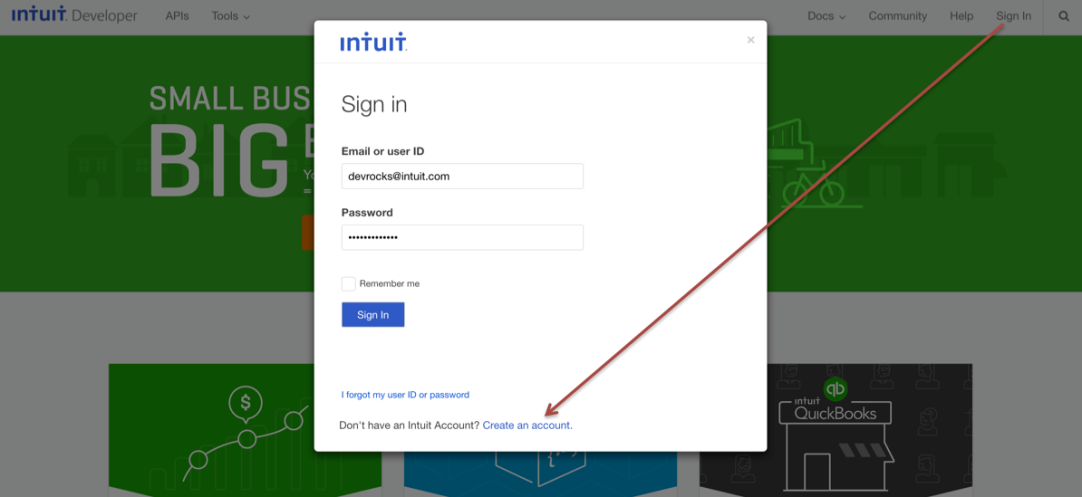
- Sign up at developer.intuit.com.

- Get QuickBooks Online sandbox access
Creating your Intuit Developer account automatically provisions a QuickBooks Online sandbox. It is filled with sample data; but more importantly for our exercise, it allows you to use your Intuit Developer credentials to authorize a connection between the sandbox and an app. You can access this sandbox account from here.
If you are only interested in exploring the QuickBooks APIs without a deep dive into OAuth, then use the QuickBooks API Explorer. Otherwise, in the following sections I’ll show you how to call these endpoints programmatically using proper OAuth tokens.
- Create a QuickBooks Online app and get API keys.

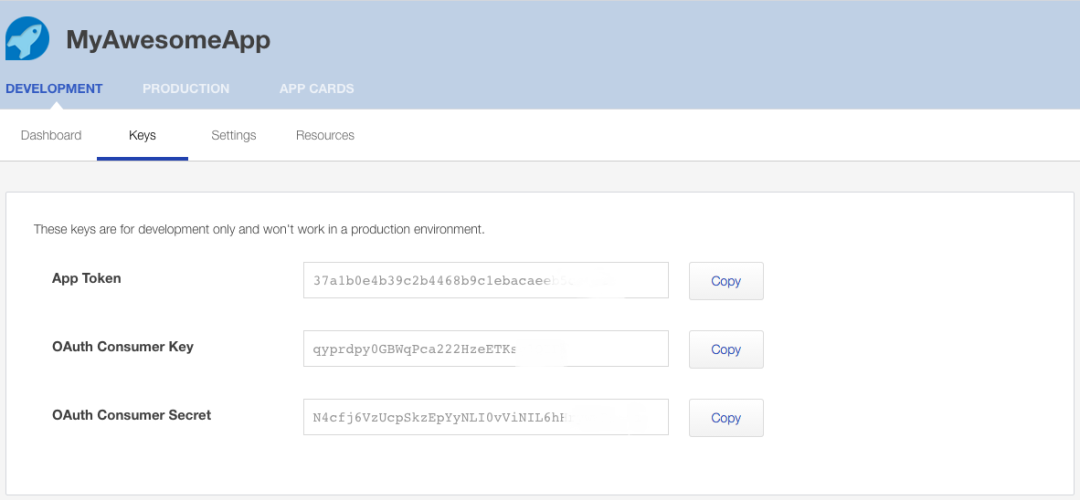
When you create an app, Intuit Developer creates API keys on your behalf. You are provided two sets:
- Development keys for connecting to your QuickBooks Online sandbox company.
- Production keys for connecting to a QuickBooks Online production company.
Below, we use development keys to connect to a QuickBooks Online sandbox company.
- Generate an OAuth access token and access token secret for your sandbox account.
Intuit Developer provides an OAuth playground tool that generates the OAuth access token and access token secret using the app’s API keys.
To get started, enter the OAuth Consumer Key and OAuth Consumer Secret from the Development | Keys tab for your app. Next, enter the Access Token Duration in seconds, up to a maximum of 15552000 seconds (180 days).
After entering these three values, click the Connect to QuickBooks button. You are prompted to connect to your QuickBooks Online sandbox company.

After authorizing the connection to your QuickBooks Online sandbox company, the playground generates the Access Token and Access Token Secret specific to the sandbox company you authorized.

- Call QuickBooks Online REST APIs using POSTMAN and cURL.
Now that you have setup your sandbox account and obtained all necessary OAuth tokens, you can try any QuickBooks Online REST API. In the following section, we will go through three of the most frequently used API scenarios.
- Get the details of the account that has Account.Id of 1.
- Get all customer records using the query endpoint.
- Create a customer.
For these three examples, we use POSTMAN, a popular chrome extension, as the REST Client. This client generates an OAuth signature to include in the call to the QuickBooks Online API endpoints.
To get started accessing the QuickBooks Online API using POSTMAN:
- Select the API Authorization type as OAuth 1.0.
- Enter the OAuth consumer keys and access tokens from the previous step.
- Select Add params to header.

Now, you are ready to make your first QuickBooks Online REST API call.
EXAMPLE 1 – READING AN ACCOUNT BY ID
In this first example, we fetch the details of the QuickBooks Online account where Account.Id=1. Enter the following Account endpoint in POSTMAN after replacing <companyId> with your QuickBooks Online sandbox company ID (realm ID) and click the Send button.
https://sandbox-quickbooks.api.intuit.com/v3/company/<companyid>/account/1
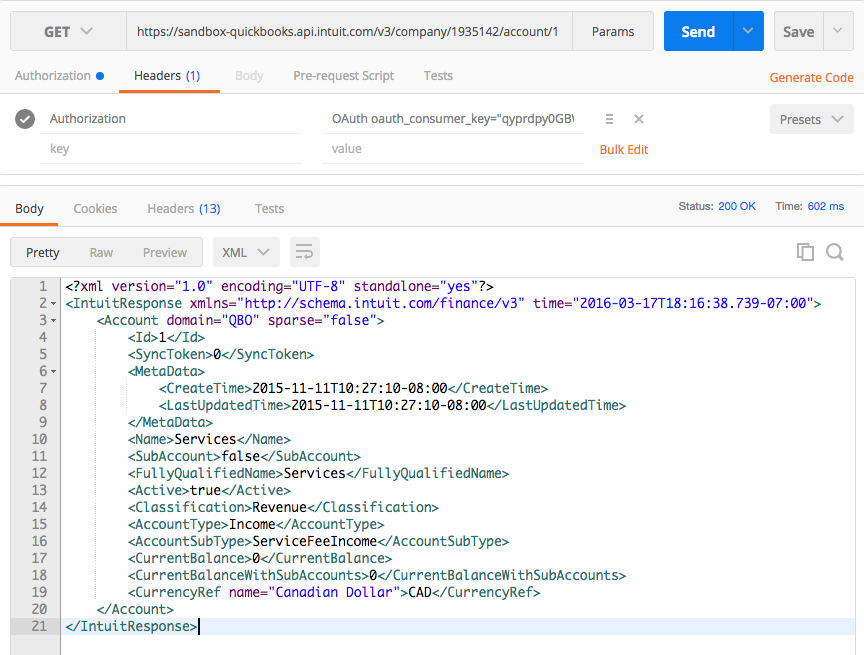
If everything goes well, you get the details of the account in an XML response. Here is a POSTMAN screenshot showing a successful API response.

You might be interested in trying this call from your command line/terminal window using cURL, which is a really useful open-source tool that works well with REST APIs.
POSTMAN generates the OAuth authorization header that you can get from the Generate Code option and use that to call the same endpoint using cURL.

Here is a cURL command that makes the same request for the Account object, using the POSTMAN generated authorization header.
curl -H ‘Authorization: OAuth \

oauth_consumer_key=”qyprdpy0GBWqPca222HzeET”, \

oauth_token=”qyprdaUzB7k9T4LPqMR88QBANTRWq05yu5″, \

oauth_signature_method=”HMAC-SHA1″, \

oauth_timestamp=”1458269″, oauth_nonce=”PC3IZk”, \

oauth_version=”1.0″, \

oauth_signature=”WKANXLV4Cc7%2F4L6QJXW%2BTB3%2FnU8%3D”‘  \

https://sandbox-quickbooks.api.intuit.com/v3/company/1935142/account/1
EXAMPLE 2 – READING ALL CUSTOMERS
In this second example, we fetch all customer entries from your QuickBooks Online sandbox company using the query endpoint. Enter the following query endpoint in POSTMAN after replacing the <companyId> with your QuickBooks Online sandbox company ID (realm ID) and click the Send button.
https://sandbox-quickbooks.api.intuit.com/v3/company/

<companyId>/query?query=Select * from Customer
In this case, we pass the Accept header as application/json to get JSON response. Here is a snapshot of a successful query API call showing the response payload.

Here is the cURL example that shows how to call the same query endpoint using the POSTMAN generated OAuth header.
curl -H ‘Authorization: OAuth \

oauth_consumer_key=”qyprdpy0GBWqPca222HzeET”,

oauth_token=”qyprdaUzB7k9T4LPqMR88QBANTRWq05yu5Yq0IhLCIGd5XOO”, \

oauth_signature_method=”HMAC-SHA1″, \

oauth_timestamp=”14582702″, \

oauth_nonce=”BgiLE2″,oauth_version=”1.0″, \

oauth_signature=”BjEnfHHKU4IjHdR6vsUsOQQ”\

‘https://sandbox-quickbooks.api.intuit.com/v3/company/1935142/query? \

query=Select+*+from+Customer
EXAMPLE 3 – CREATING A CUSTOMER
In this third example, we see how to create a customer record using QuickBooks Online APIs. Like the last two examples, enter the following customer endpoint in POSTMAN after replacing <companyId> with your QuickBooks Online sandbox company ID (realm ID) and click the Send button.
https://sandbox-quickbooks.api.intuit.com/v3/company/<companyid>/customer
QuickBooks Online APIs support XML and JSON payloads. So you can either pass application/xml or application/json as the content-type. For example, add the following header in POSTMAN to pass a Customer object in XML format.
Content-type:application/xml
Here is a simple customer create payload, which you can try right away.
<Customer xmlns=”http://schema.intuit.com/finance/v3″ domain=”QBO” sparse=”false”>

<CompanyName>Best Company</CompanyName>

<DisplayName>Sir Jonhn Doe</DisplayName>

<BillAddr>

<Line1>123 Main Street</Line1>

<City>Mountain View</City>

<Country>USA</Country>

<CountrySubDivisionCode>CA</CountrySubDivisionCode>

<PostalCode>94042</PostalCode>

</BillAddr>

</Customer>
Here is the POSTMAN snapshot showing the response payload for the newly created Customer object.

The following cURL command shows how to call this customer create endpoint using the POSTMAN generated OAuth header.
curl -H ‘Authorization: \

OAuth oauth_consumer_key=”qyprdpy0GBWqPca222HzeET”,\

oauth_token=”qyprdaUzB7k9T4LPqMR88QBANTRWq05yu5Yq0IhL”,\

oauth_signature_method=”HMAC-SHA1″, \

oauth_timestamp=”14582706543223″,\

oauth_nonce=”IFCQp1″, \

oauth_version=”1.0″,\

oauth_signature=”XY0gir5IP8vIPHerDhjaiVKIW”‘ \

-H “Content-Type: application/json” \

-d ‘{“Notes”: “This is a test customer record”, \

“DisplayName”: “QBODefault Customer”}’\

https://sandbox-quickbooks.api.intuit.com/v3/company/1935142/customer
These three samples are available in the following POSTMAN collection file. You can import it in your POSTMAN and try the calls right away.
https://www.getpostman.com/collections/7f9dc8fb13fa5539128a
In summary, we’ve demonstrated how to generate components of an OAuth authorization header to make QuickBooks Online API calls to your sandbox account. If you want to test with your QuickBooks Online production account, use the method above with your production keys instead. You will also need to change the API base URL to https://quickbooks.api.intuit.com.
In a future post, we will see how to use these tokens with the recommended client SDKs which take care of authentication, data serialization, and several other aspects of QuickBooks Online REST API calls.


Leave a Reply